User Guide
The following introduction to Linticator will guide you through the installation and configuration steps and shows you how Linticator assists you in day-to-day programming. Linticator works with both FlexeLint and PC-lint, so the following instructions are applicable for both.
Installation
See the Installation page.
Workspace Configuration
After restarting Eclipse, Linticator will show a wizard that guides you through its configuration process.

The second page of the wizard asks you to configure at least one Lint installation. Add New will open a wizard that guides you through the steps of configuring Lint. If you’re already using Lint, the chances are good that you have all the essential files installed. Otherwise, it might be necessary to download additional configuration files from the Gimpel website.
You can also copy and modify existing configurations.
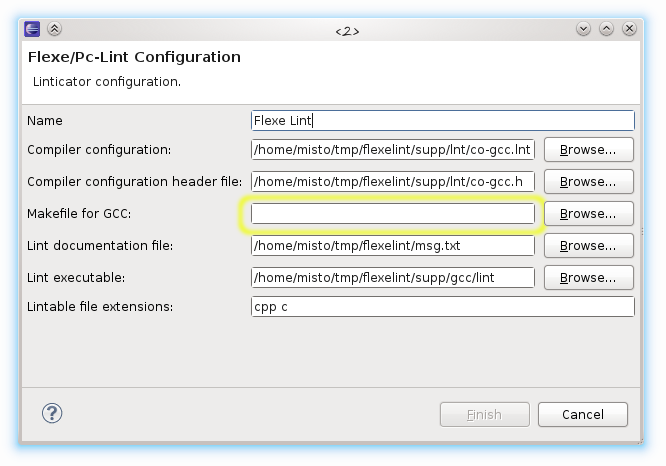
The individual entries for a configuration are:
- Name: The name for the configuration can be chosen arbitrarily and is used only for displaying.
- Compiler Configuration: The Lint compiler configuration file typically has a lnt file extension and can be found in supp/gcc folder. The default is named co-gcc.lnt.
- Compiler Configuration Header File: The Lint compiler configuration header file can be found in supp/gcc folder. The default is named co-gcc.h.
- Makefile for GCC: The Makefile can be used so that Linticator can automatically build several of the necessary configuration files. This is not included in the Flexe/PC-Lint distribution but can be obtained from Gimpel’s Flexe/PC-Lint website. For compilers other than GCC, this entry is not required and can be omitted. Note that this isn’t your project’s Makefile but the one from Gimpel.
- Lint Documentation File: The file containing all the detailed message descriptions. The default file is msg.txt. See the FAQ to learn how to generate the file when using PC-lint Plus.
- Lint executable: The Lint executable that was compiled as part of the Lint installation.
- Lintable file extensions: The file extensions that should be processed by Lint.
The third page of the wizard lets you test the configuration: It creates a project in your workspace and analyzes it. If an error occurs, the output can be saved to a file and used for further diagnostics of the problem. This configuration test can also be found in the Linticator menu Test Configuration.
If you do not want to configure Linticator, you can finish the wizard with “Don’t Ask Again”. This configuration dialog can later be found in Eclipse’s preferences under the Linticator entry.
Project Configuration
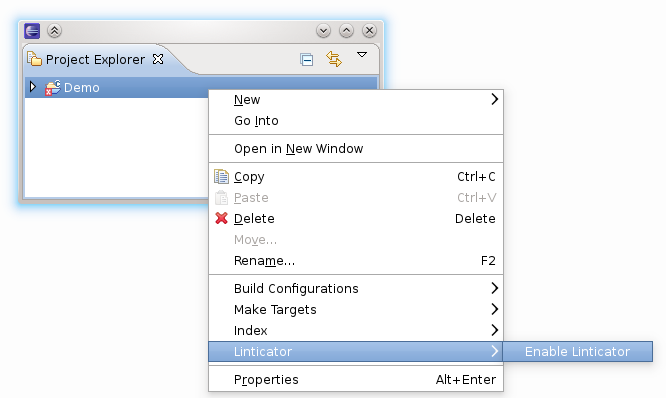
After the workspace configuration, we also have the possibility to configure per-project settings. Before we can do that though, we need to enable Linticator for each of the CDT projects we want to include in the analysis.
Project Properties
Linticator gives you several options to further customize lint.
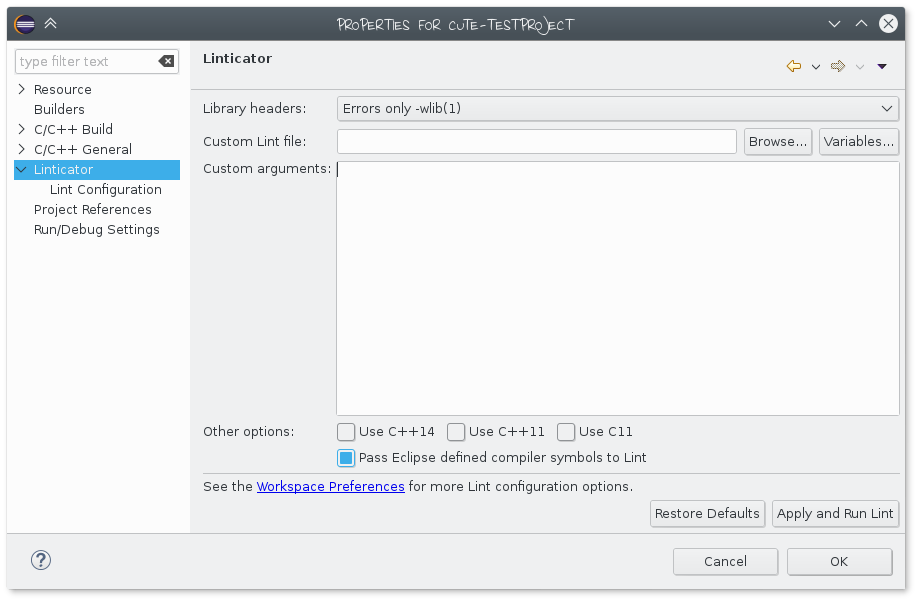
The project properties dialog lets you customize which library messages to show (the entries correspond to wlib(0) — wlib(4)). Options configured in the custom file take precedence over the built in Linticator options, and the ones specified in the text area override those defined in the custom lint file.
Using Linticator
Enabling the Linticator Nature for a CDT project will also add two so-called builders to your project. One keeps track of changes in your configuration and rebuilds the lint configuration files accordingly. The other one runs the Lint analysis whenever you build your project. Linting a project is done in a process that does not block the IDE, so you can continue working while Linticator checks your code.
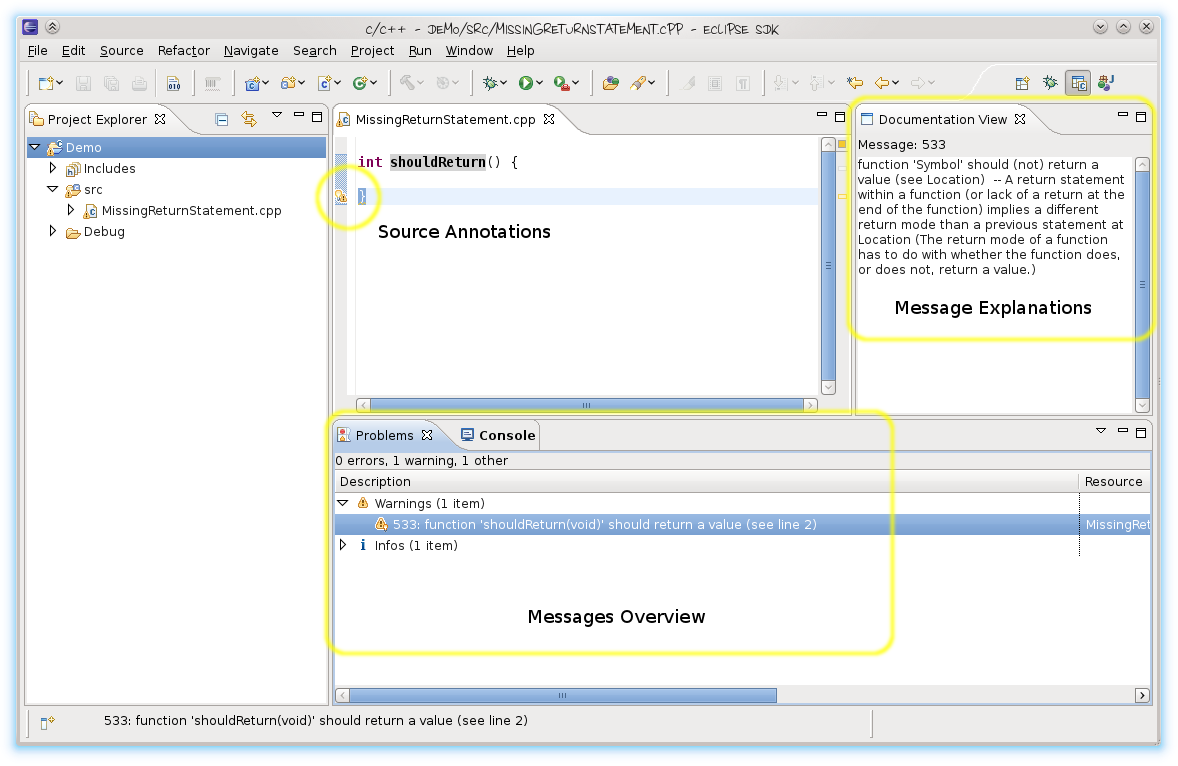
The output of a lint analysis is parsed and used to populate the problems view and to create markers in source editors, as can be seen in the following screenshot:
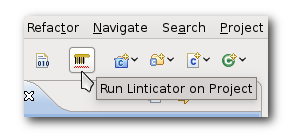
When you build your project, it will also be linted. To trigger a Lint analysis on your own, use the Linticator button in the toolbar (see screenshot below) that is enabled whenever a Linticator enabled project is selected or use the Run Linticator on Project from the project’s Linticator context menu.
Problems View
Eclipse’s Problems View already shows you messages from the compiler, and now with Linticator, also messages from Lint. Double-clicking on a message jumps to the respective source location and, if the Documentation View is active, shows an explanation for the message.
Documentation / Message View
The documentation or message view shows the explanation for a selected message from the problems view (should the Documentation View not be visible, use Show Documentation from an entries context menu).
Lint Console
For users who want to see the exact output from Lint, there’s a Linticator Console:

The console output helps you to verify what Linticator does; you can even copy-paste the lint command and run it in a shell on your own.
Quickfixes
One of the biggest benefits of using Linticator are its Quickfixes that let easily fix certain problems. For a comprehensive documentation of the currently provided Quickfixes, see Quickfixes.
Library Problems View
Lint messages caused by libraries you use are not shown in the default Problems View but in a separate Library Problems View.
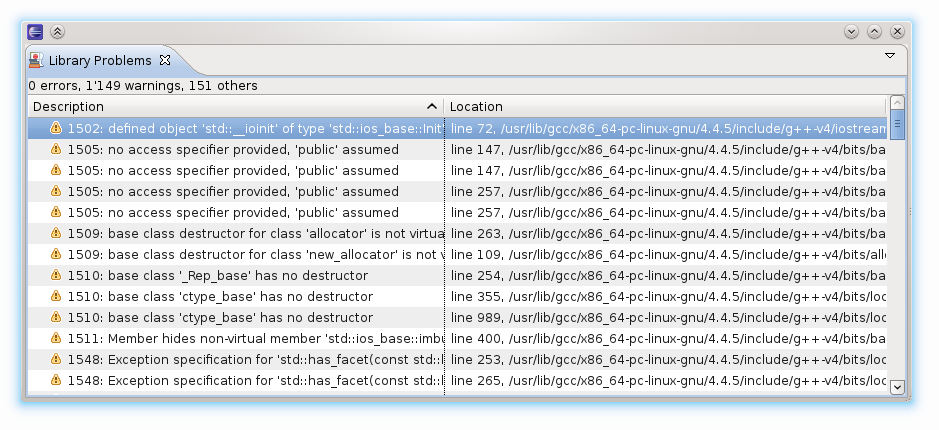
This extra view can be enabled via Window → Show View → Other and selecting Library Problems from the Linticator category.